Advanced Techniques for RPN-67 and RPN-97


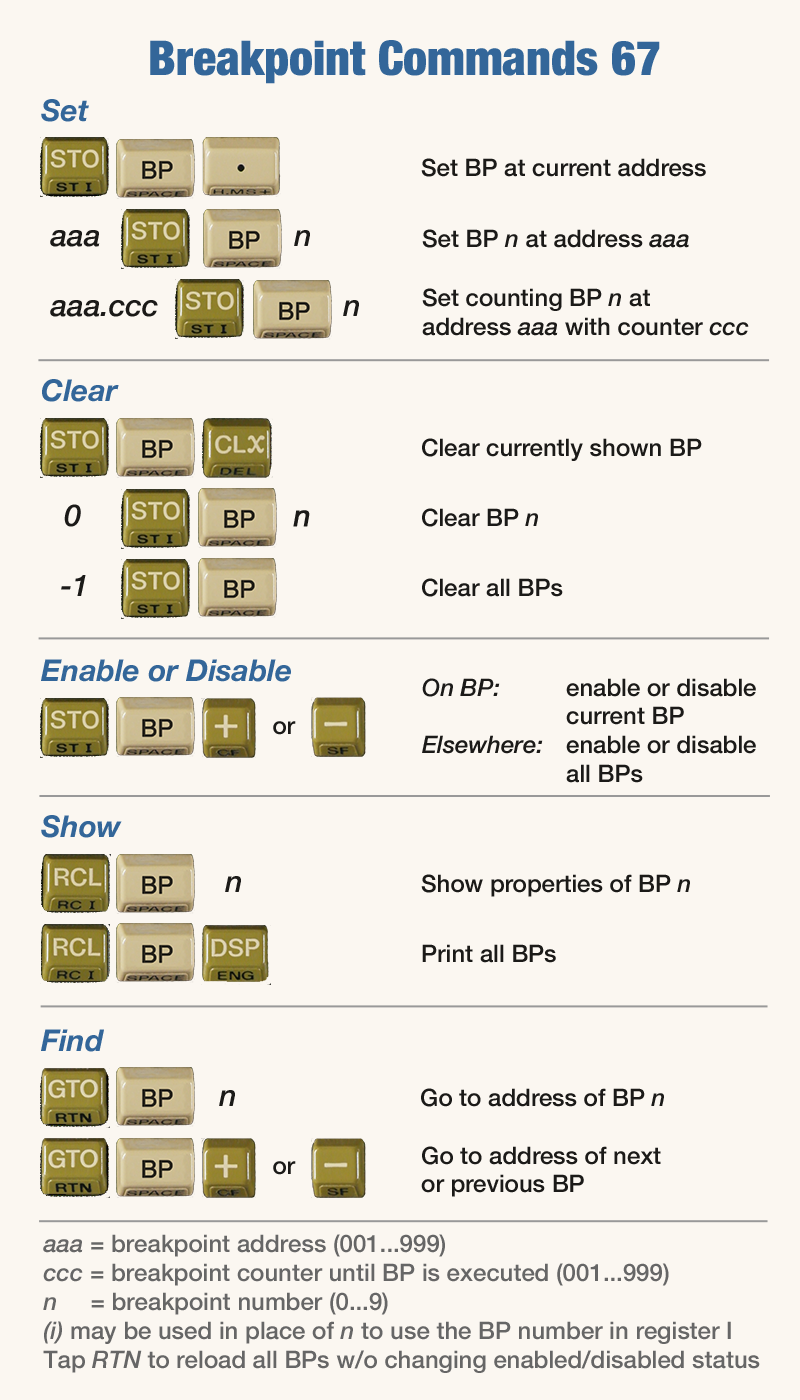
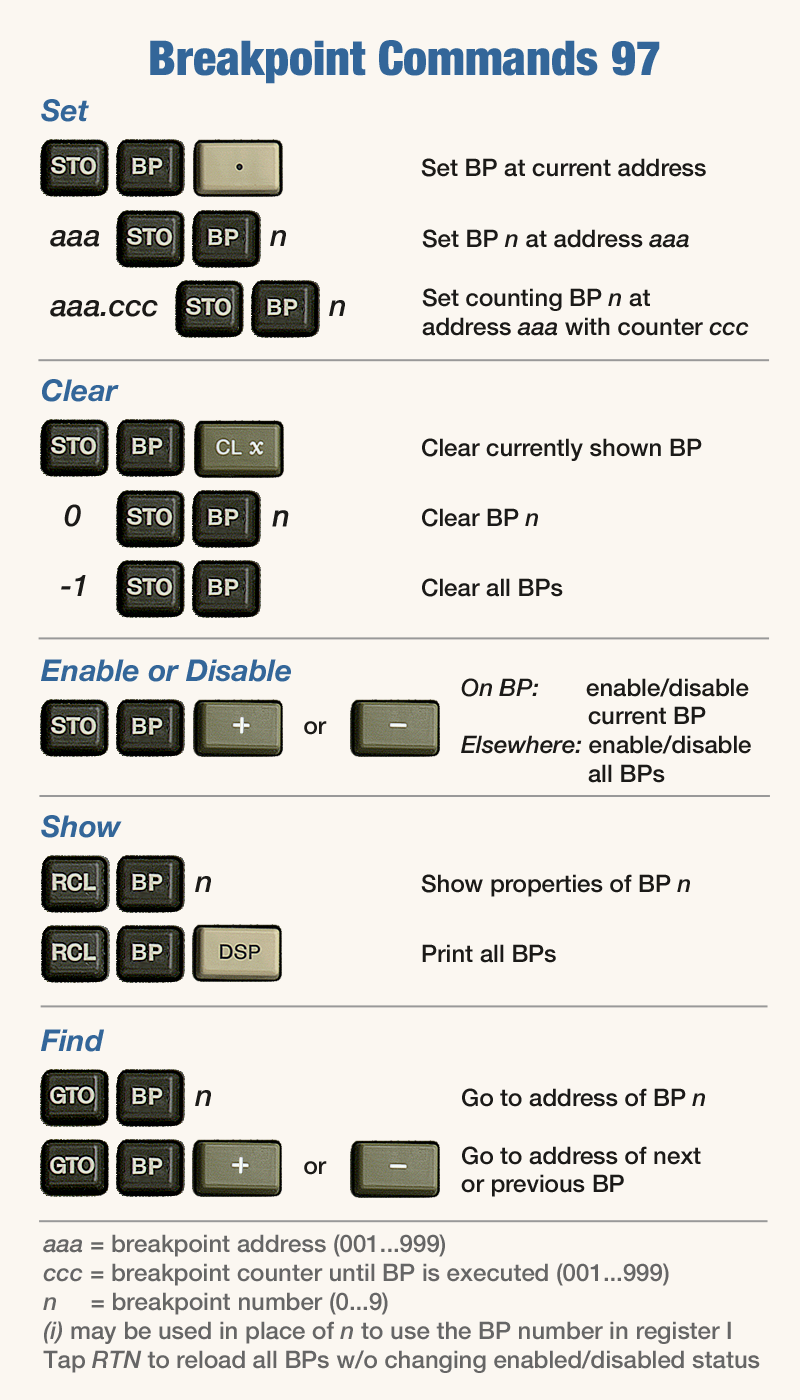
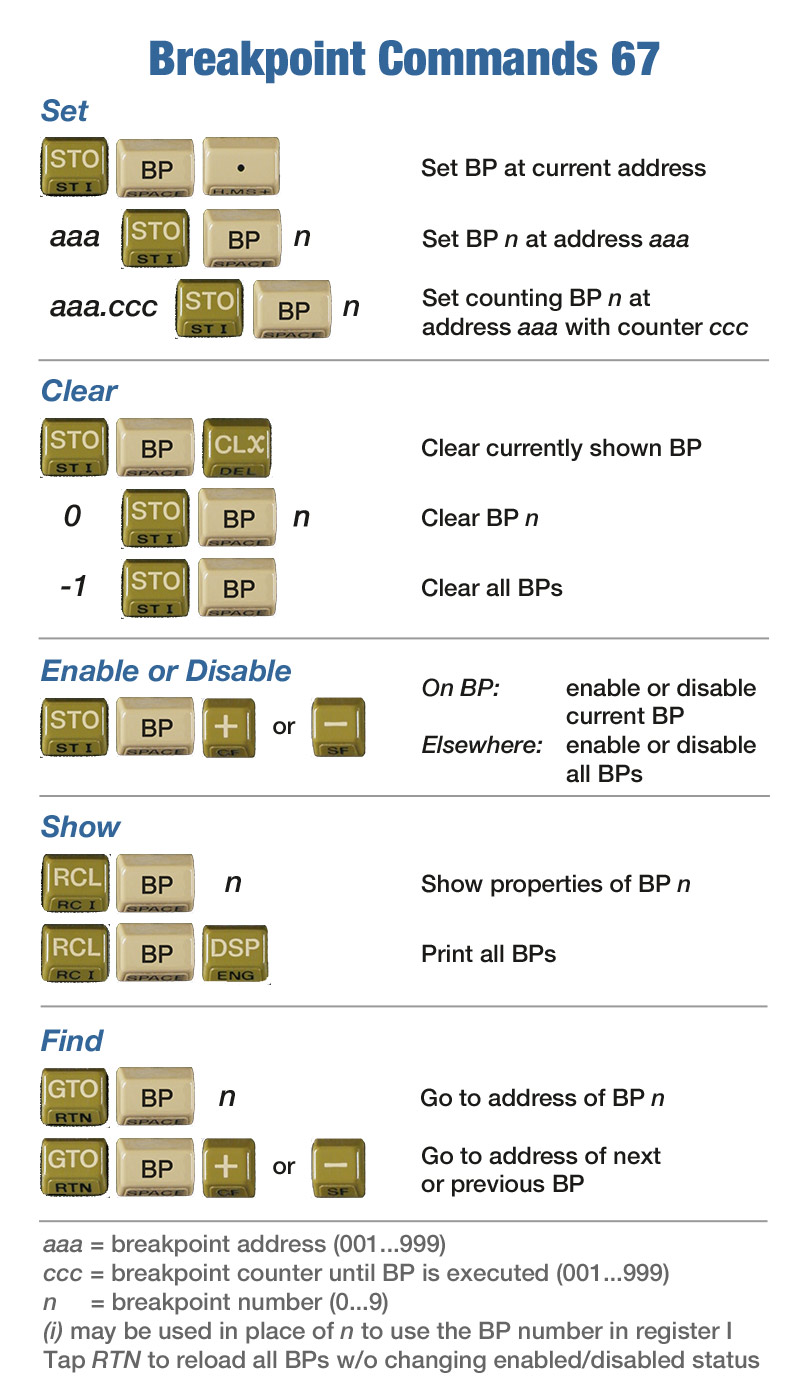
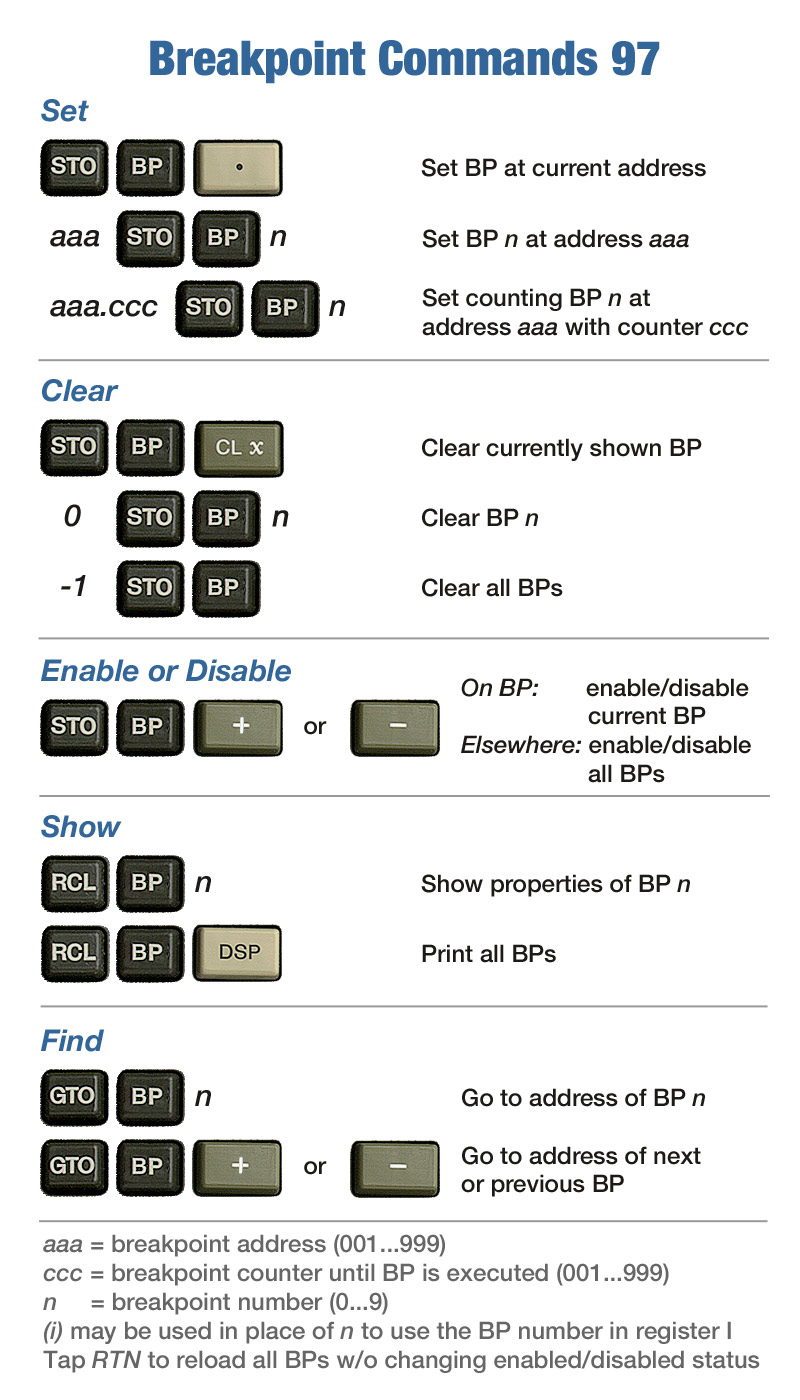
Breakpoints


On the original calculators, forcing program execution to stop at a certain step – often referred to as "setting a breakpoint" – required inserting an R/S instruction at that step. This was cumbersome, as it not only changed the step numbers in the program, but you also had to remember the locations of the breakpoints in order to remove them later.

RPN-67/97 solves this by attaching breakpoint information to steps without modifying the user's program in any way. A number of breakpoint commands are available.

Up to 10 breakpoints may be simultaneously defined. Optionally, a counter may be specified for each breakpoint, causing it to fire only when the breakpoint step has been encountered a certain number of times (up to 999).

Enabling the breakpoints feature
Breakpoint recognition is governed by the setting "Use Breakpoints 0..9".
If ON, you may use and manage breakpoints.
If OFF, you have no access to breakpoints.

Displaying breakpoint commands
Whenever STO, RCL or GTO has been tapped, the R/S key is renamed to BP.

While BP is shown, tap the info button in the lower left corner to reveal a breakpoint command reference.

On RPN-67 SD, tap the question mark in the lower-right instead.


Setting a breakpoint
1) To set a simple breakpoint n (n = 0...9) at address aaa:

Directly:
• Tap  aaa  STO  BP  n
Indirectly:
• Tap  aaa  STO  BP  (i)

In the latter case, the value in I must be larger than -10 and smaller than +10.

Example: 177  STO  BP  1 (attaches breakpoint 1 to step 177)

The breakpoint will be re-armed automatically after it has fired.

Note that this command is programmable. This allows you to set breakpoints dynamically while the program is running.


2) To set a simple breakpoint at the current address:

• Tap  STO  BP  .

The breakpoint will be assigned the highest available free number.
If all 10 breakpoints are used up, an error message will be displayed.


Setting a counting breakpoint
To set a breakpoint n at address aaa that will fire on the ccc-th (ccc = 1...999) execution of step aaa:

• Tap  aaa.ccc  STO  BP  n

Example: 92.003  STO  BP  5 (attaches breakpoint 5 to step 092 and halts program on the third execution of step 092)

After firing, the breakpoint will behave like a normal breakpoint, firing every time the specified step gets executed.
Restoring all breakpoints (by stopping the program and tapping the RTN key) will restore the specified count.


Deleting breakpoints
1) To delete breakpoint n:

• Tap  0  STO BP  n

Example: 0  STO  BP  1 (deletes breakpoint 1)

2) To delete the breakpoint at the current step:

• Tap  STO BP  CLx

3) To delete all breakpoints:

• Tap  -1  STO BP

Note: Other negative arguments are ignored.

Enabling and disabling breakpointss
1) If the current step has a breakpoint attached to it:

• Tap  STO BP + to enable the breakpoint
• Tap  STO BP – to disable the breakpoint

2) If there is no breakpoint attached to the current step:

• Tap  STO BP + to enable all breakpoints
• Tap  STO BP – to disable all breakpoints

Note that this commands are programmable. This allows you to enable/disable breakpoints dynamically while the program is running.

Displaying and printing breakpoints
1) To display the properties of breakpoint n (n = 0...9):

Directly:
• Tap  RCL  BP  n
Indirectly:
• Tap  RCL  BP  (i)

In the latter case, the value in I must be larger than -10 and smaller than +10.

Example: RCL  BP  1 will display 177.001 if step 177 has a simple breakpoint attached to it.

Note that this command is programmable. This allows you to change the properties of a breakpoint dynamically while the program is running.


2a) To print the properties of all breakpoints:

• Tap  RCL  BP  .

The number of stored breakpoints is shown in the display.

Example output:  BP 1: 004/005 ( 2)

(Breakpoint 1 is attached to step 4 with a counter of 5. The current count is 2.)

This command also works in W/PRGM mode. It is identical to 20  OP  SYS/INFO.


2b) To print the properties of all breakpoints:

• Tap  RCL  BP  DSP (or STO  BP  DSP)

This is the same as RCL  BP  . above, except the number of breakpoints is not returned, thus leaving the stack unchanged.

This command also works in W/PRGM mode.

Finding breakpoints
1) To go to the step of breakpoint n (n = 0...9):

Directly:
• Tap  GTO  BP  n
Indirectly:
• Tap  GTO  BP  (i)

In the latter case, the value in I must be larger than -10 and smaller than +10.
If the specified breakpoint does not exist, an error message is shown.

Example: GTO  BP  1 will show step 177 if this step has breakpoint 1 attached to it.

This command also works in W/PRGM mode.


2) To go to the step of the next breakpoint:

• Tap  GTO  BP  +

This command also works in W/PRGM mode.


3) To go to the step of the previous breakpoint:

• Tap  GTO  BP  –

This command also works in W/PRGM mode.

Restoring all breakpoints
To restore all breakpoints to their defined values: tap RTN.

Note that restoring breakpoints does not change their enabled/disabled status.


Displaying breakpoint status

The current state of breakpoints is shown in the register display as follows.
(Screenshots from RPN-97 Pro)


Use of breakpoints has been turned off in Settings.


No breakpoints are defined.


Breakpoints are stored but all of
them are disabled.


Breakpoints are stored and at least
one
of them is enabled.


Step 005 has breakpoint 1 attached
to it. It is currently disabled.


Step 005 has breakpoint 1 attached
to it. It is currently enabled.

Auto-deletion of breakpoints
Breakpoints are automatically deleted after replacing the current program card with a different card, except when merging.

Inserting and deleting program steps
Modifying the program by inserting or deleting steps doesn't affect breakpoints.
Breakpoint addresses are automatically adjusted.


Using Breakpoints

Make sure that "Use Breakpoints 0..9" is set to ON in Settings.

Enter the (rather useless) program shown below.

     *LBL A:
001:  21 11       LBL A  
002:  00          0  
003:  35 46       STO I  
004:  23 12       GSB B  [007]
005:  36 46       RCL I  
006:  24          RTN  

     *LBL B:
007:  21 12       LBL B  
008:  16 26 46    ISZ I  
009:  36 46       RCL I  
010: -23          EEX  
011:  02          2  
012:  16-34       x>y?  
013:  22 12       GTO B  [007]
014:  24          RTN  

(Note that in PRGM mode, you can paste the following listing right into the calculator's display.)

LBL A  
0  
STO I  
GSB B
RCL I  
RTN  
LBL B  
ISZ I  
RCL I  
EEX  
2  
x>y?  
GTO B
RTN  

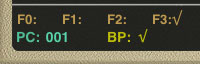
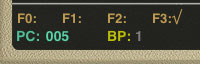
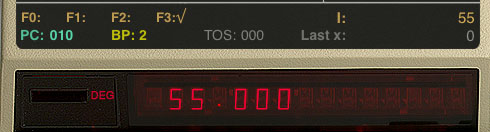
The program clears register I, then – after calling subroutine B – displays the value of register I.
Subroutine B increments register I one hundred times, then returns.

Make sure registers are displayed (tap the View button or the area above the display.)

Display 3 decimal digits:
FIX DSP 3

If necessary, clear any breakpoints:
-1 STO BP

Tap A to run the program → 100.000
(Note how register I has counted up to 100.)

Attach breakpoint 1 to step 5:
5 STO BP 1

Attach counting breakpoint 2 to step 10.
Make it trigger after 55 occurrences of step 10:
10.055 STO BP 2

Examine the breakpoints:
RCL BP .2.000 (two breakpoints stored)

  BP 1: 005/001 (  1)
  BP 2: 010/055 ( 55)
  

Breakpoint 1 has the default count of 1 attached. It will fire when step 5 is reached, and then re-arm automatically.
Breakpoint 2 will fire when step 10 is reached for the 55th time. It will then re-arm as a normal breakpoint with count 1 automatically.

Tap A to run the program → 55.000
Breakpoint 2 has stopped program execution on the 55th occurrence of step 10 (reflected by the value in I):

Tap R/S to continue → 56.000
Since breakpoint 2 is not counting anymore, it fires on the next loop execution.

Tap R/S repeatedly and watch register I increase by steps of one.

Examine the breakpoints:
RCL BP DSP (Note that X remains unchanged)

  BP 1: 005/001 (  1)
  BP 2: 010/055 (  1)
  

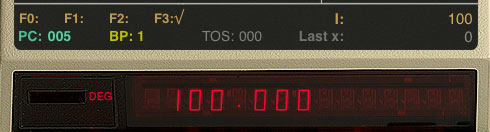
Both breakpoints behave in the same way right now.

Let's disable BP 2, so the program may finish the loop and continue.
STO BP – (this disables the currently shown breakpoint)

Tap R/S to continue → 100.000
After finishing the loop in subroutine B, program execution is stopped again at step 5 by breakpoint 1:

Examine the breakpoints:
RCL BP DSP

  BP 1: 005/001 (  1)
  BP 2: 010/055 (off)
  

Restart the program by tapping A100.000

Since breakpoint 2 in subroutine B is disabled, only breakpoint 1 may stop execution.

To selectively enable breakpoint 2 again:
GTO BP 2
STO BP +

Examine the breakpoints:
RCL BP DSP

  BP 1: 005/001 (  1)
  BP 2: 010/055 (  1)
  

Note that breakpoint 2 still counts to one.
Breakpoints are re-armed to their defined values by tapping RTN while the program is not running.

RTN
RCL BP DSP

  BP 1: 005/001 (  1)
  BP 2: 010/055 ( 55)
  

Breakpoint 2 will again count 55 occurrences before firing.

To temporarily disable all breakpoints, go to any step that does not have a breakpoint attached to it.

For example:
RTN
STO BP –

RCL BP DSP

  BP 1: 005/001 (off)
  BP 2: 010/055 (off)
  

Large size:  RPN-67    RPN-97


Source Code Editing


You are not restricted to punching keys to enter programs into RPN-67 and RPN-97. Apart from loading cards presented on this website, you may also paste program listings into the emulators, either in the program listing (in RUN mode) or in the display (in PRGM mode). You may also type in programs directly in the program listing field.

Program listings may contain keycodes, but they don't have to. If keycodes are present, they will be used – just make sure to set the switch "Convert from HP-xx" as appropriate. (Conversion can't be specified if you paste your listing into the calculator's display.)

If keycodes are not provided, the emulators will look for command symbols (mnemonics), like LBL A or DSP 9. You may use the HP-67/97 paper tape symbols defined by Hewlett-Packard (see link below), but you are not required to strictly follow the syntax.
For example, arc sine may be entered as SIN⁻¹, SIN-1, SIN1, ASIN, g SIN (on HP-67), or f SIN (on HP-97), in either upper or lower or mixed case.

Note that only commands and operations available on the original calculators are supported.
The only exception is LBL, GTO and GSB with extended targets. E.g. "gto 67" will be accepted.


HP-67/97 Symbols and Keycodes


Example

This input:
lbl A
I
20
-
x=0
1x
r down
xy
stoi
isz I
x<>y
sto (i)
iszI
sf 1
lbl 1
rc I
2
/
rtn

will be instantly converted into this:
(HP-97 keycodes shown)

     *LBL A:
001:  21 11      LBL A
002:  36 46      RCL I
003:  02         2
004:  00         0
005: -45         -
006:  16-43      x=0?
007:  52         1/x
008: -31         R↓
009: -41         x≷y
010:  35 45      STO (i)
011:  16 26 46   ISZ I
012: -41         x≷y
013:  35 45      STO (i)
014:  16 26 46   ISZ I
015:  16 21 01   STF 1

      LBL 1:
016:  21 01      LBL 1
017:  36 46      RCL I
018:  02         2
019: -24         ÷
020:  24         RTN

• In PRGM mode, go to the step where you want to insert the new code, then tap and hold the display and paste.

• In RUN mode, open the card manager, tap and hold the spot in the listing where you want to insert the code, then paste.

• In the listing, edit any line by typing in the desired symbol. Make sure to also delete the current keycode, as keycodes take precedence over symbols.

 
XML Format of RPN-67 Cards

<?xml version="1.0" encoding="UTF-8"?>
<!DOCTYPE plist PUBLIC "-//Apple//DTD PLIST 1.0//EN"…">
<plist version="1.0">
<dict>
  <key>calcModel</key>
  <string>67</string>         -- Calculator model
  <key>cardCategory</key>
  <integer>50</integer>       -- Category number
  <key>cardCreated</key>
  <date>2017-03-17T14:04:37Z</date>
  <key>cardData</key>         -- Program steps
  <array>
    <string>513</string>      -- Settings
    <string>31 25 11</string> -- Key codes
    <string>31 81</string>
    <string>22 01</string>
    <string>42</string>
    <string>_+2.54</string>   -- Floating point step
    <string>71</string>
  </array>
  <key>cardDescription</key>  -- Description field
  <string>Body-Mass-Index calulation</string>
  <key>cardLabels</key>       -- Card labels
  <array>
    <string>lb</string>       -- A
    <string>ft.in</string>    -- B
    <string></string>         -- C
    <string>BMI old</string>  -- D
    <string>BMI 2013</string> -- E
    <string>kg</string>       -- a
    <string>m.cm</string>     -- b
    <string></string>         -- c
    <string></string>         -- d
    <string></string>         -- e
  </array>
  <key>cardModified</key>
  <date>2017-03-17T14:07:37Z</date>
  <key>cardPac</key>          -- HP Pac ID (0=none)
  <integer>0</integer>
  <key>cardTitle</key>        -- Card title
  <string>BMI Calculator</string>
  <key>cardType</key>         -- Card type
  <integer>1</integer>        -- 1=Prog, 2=Data
  <key>cardUsage</key>        -- Instructions
  <string>Enter weight and height in
desired units.

Press D or E to calculate.</string>
</dict>
</plist>
						
Note:
To format the Instructions field as desired, keep line length to 29 characters or less.


Extended Single-stepping (RPN-97 only)


Unlike the original calculators, both RPN-67 and RPN-97 allow you to single-step into a subroutine. In many cases, however, 
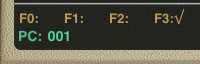
you're not interested in the entire subroutine, even less so in the subroutines called by it.
Extended single-stepping solves this problem by allowing to continue execution at full speed until the RTN statement of the current subroutine is reached.

Executing extended single-stepping

• Make sure "Single-Step Subroutines" in Settings is set to ON.

• Single-step into a subroutine.

• Tap EXT SST

The program continues running at full speed, returning to single-step mode after executing the return from the subroutine.

Single-stepping into subroutine 1, then executing EXT SST at the location shown above, will run the program until the step marked "Stop" is reached.


Data Cards


Data cards store register contents which may be retrieved by simply reading the card. This is very useful for presetting registers with constants without wasting program steps.


To write a data card:


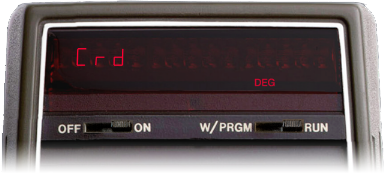
RPN-67 and 97 Pro also import data cards created by RPN-65 (see right).

W/DATA is programmable. If the running program encounters this command, it will stop and show the message "Crd". You can then proceed as shown above.
After returning from the card manager, the program will continue automatically.
You can also dismiss the "Crd" prompt by tapping any key. Then tap R/S to continue program execution.


RPN-65 RPN-67/97
R0...R9   R0...R9
RA...RE   RA...RE
Ra...Re   RS0...RS4
R.00...R.99   R.00...R.99
     
Register mapping of imported data cards


Program Cards with Registers


In addition to regular data cards, you can save the contents of all internal and extended registers on program cards.

This is convenient for programs involving frequently updated data, like managing
an inventory, a stock portfolio, data-logging, or doing checkbook-balancing.

  • To save calculator registers on the selected program card
  • • In RUN mode, open the Card Manager
  • • Select the desired program card
  • • Set the switch "With Regs" to ON
  • • Tap "Write Card" (67 SD: "Save") to resave the program along with all registers

  • To load registers from the selected program card into the calculator
  • • In RUN mode, open the Card Manager
  • • Select the desired program card
  • • If the switch "With Regs" shows a dark outline, the card contains registers
  • • Set the switch to ON
  • • Tap "Load Card" (67 SD: "Load") to load the program along with all stored registers

  • To remove registers from a program card
  • • In RUN mode, open the Card Manager
  • • Select the desired program card
  • • Make sure the switch "With Regs" is OFF
  • • Tap "+" and select "Duplicate" to make a copy of the card without registers

  • (RPN-67/97 Pro)
    To import a program card with registers
  • • In RUN mode, open the Card Manager
  • • Select the program card to be replaced
  • • Make sure the switch "With Regs" is ON
  • • Execute "Import from iTunes" to import the card with registers
  • • Tap "Write Card" to save the program

  • (RPN-67 SD)
    To import a program card with registers
  • • In RUN mode, open the Card Manager
  • • Select the program card to be replaced
  • • The switch "With Regs" may be in any position
  • • Execute "Import from iTunes" to import the card with registers
  • • Make sure the switch "With Regs" is OFF
      (since you don't want to store the calculator's registers)
  • • Tap "Save" to save the program

Tips:
By storing the stack in registers R.00..R04 (using STO ENTER), you can easily restore the stack on loading the program. Just execute RCL ENTER, possibly as an auto-executing subroutine (see "Auto-executing label 99" in section "Extensions".)

To save program changes, don't turn "With Regs" on, unless you want to update the register data. Registers stored on a card are not affected by resaving the program.


Card contains no registers


Registers will be written to
or loaded from card


Card contains registers


Using Touch ID / Face ID


On devices with activated Touch ID or Face ID, you may protect the register data stored on program cards.

  • To protect registers with Touch ID or Face ID
  • • Store the value 89 89 89 89 89 (without the blanks) in register R.89

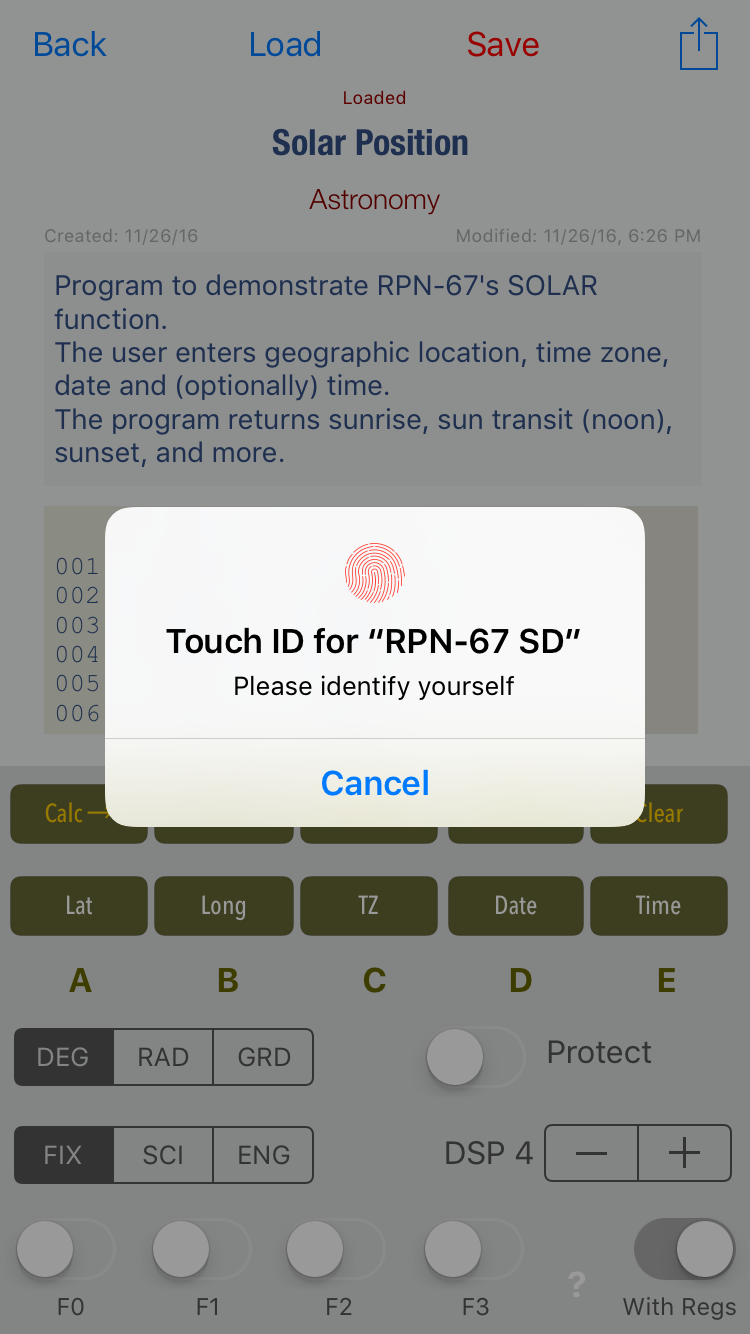
From now on, whenever registers are about to be stored or retrieved from the
associated program card, you'll be prompted to identify yourself.

If authorization fails, registers will be simply ignored.

Fallback to a passcode is not supported.


  • To remove ID protection from a card
  • • Change the value in register R.89 to a value different from 89 89 89 89 89
  • Resave the card, including registers


Note:
On the iPhone, activating "With Regs", then double-tapping the ID-protected card in the card list will take you back to the card details. Use "Load" to load card.


Copyright © 2019. All rights reserved.